
Build your figure
Dummy 13 Assembly Guide
Sort the pieces, follow the official walkthrough, and bring your fully articulated Dummy 13 to life.
Official walkthrough
Assemble along with Lucky 13 Toys
The video below is the original creator's complete assembly guide. Pause whenever you need a closer look at a joint or armor piece.
Before you start
A few minutes of prep makes assembly easier
- Lay out every part.Group the inner frame pieces separately from the outer armor pieces so matching parts are easy to find.
- Remove print residue.Trim away any remaining brim or small strings. A clean edge helps each snap-fit joint seat correctly.
- Match the shapes before pressing.Check the video orientation and support both pieces close to the joint. Firm, steady pressure works better than twisting.
- Test movement gently.After each section is assembled, move the joint through a small range before adding the next armor piece.
Fit help
When a joint does not want to snap
Too tight
Do not use a hammer or force the joint at an angle. Lightly file or sand the contact area, remove the dust, and try again with the parts supported close to the joint.
Looks flat on one side
That is intentional. Dummy 13 ball joints have a flat area so the parts can print without supports; it does not prevent normal posing.
No screws or hardware
The figure is designed to snap together. You should not need glue, screws, or extra hardware for normal assembly.
Still stuck? Bring the figure and all of its parts to North Pole 3D Printing. We can help identify orientation, fit, or print-quality issues before a part gets damaged.
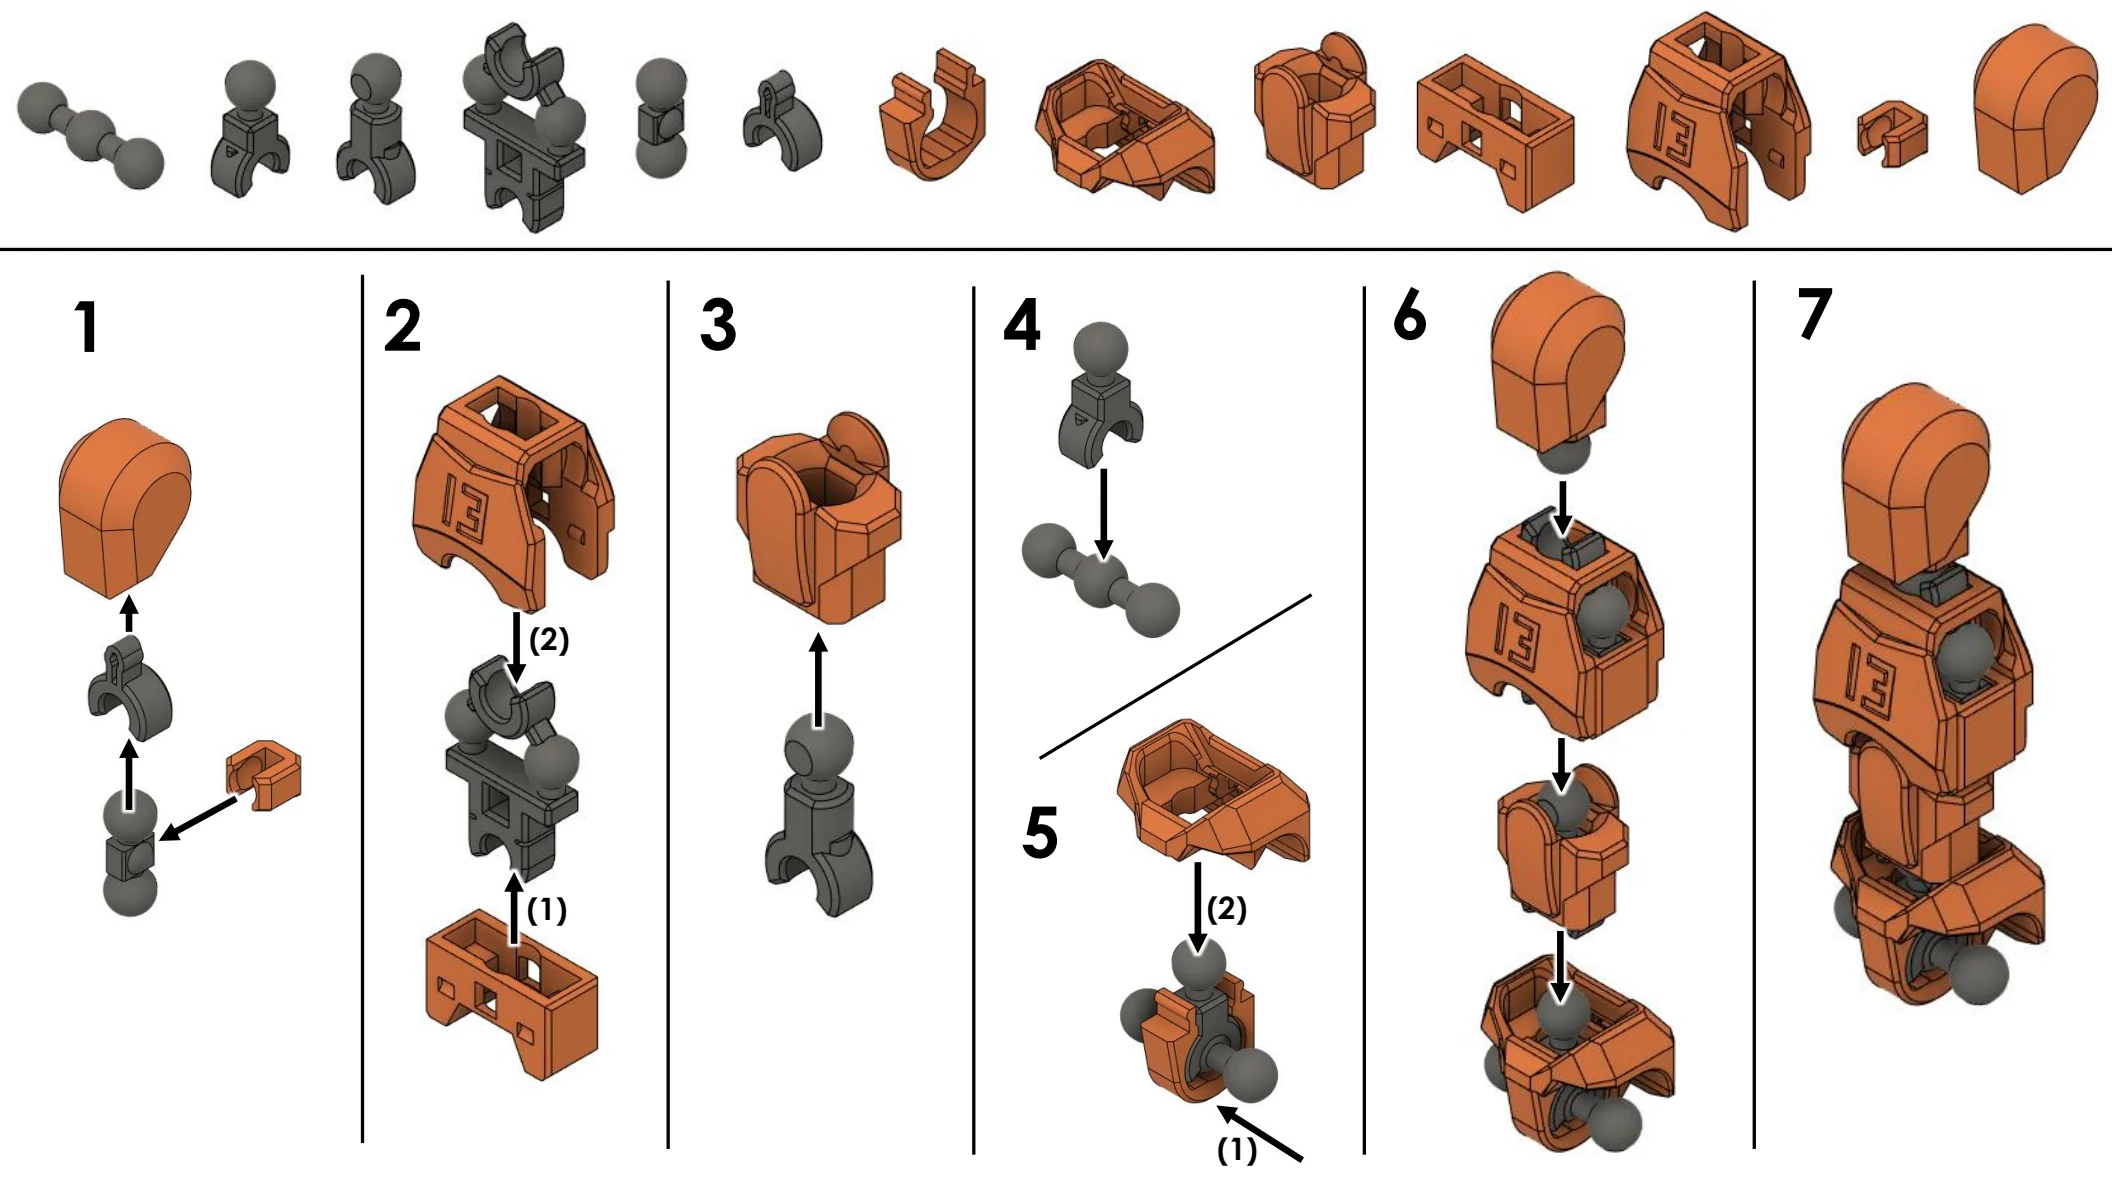
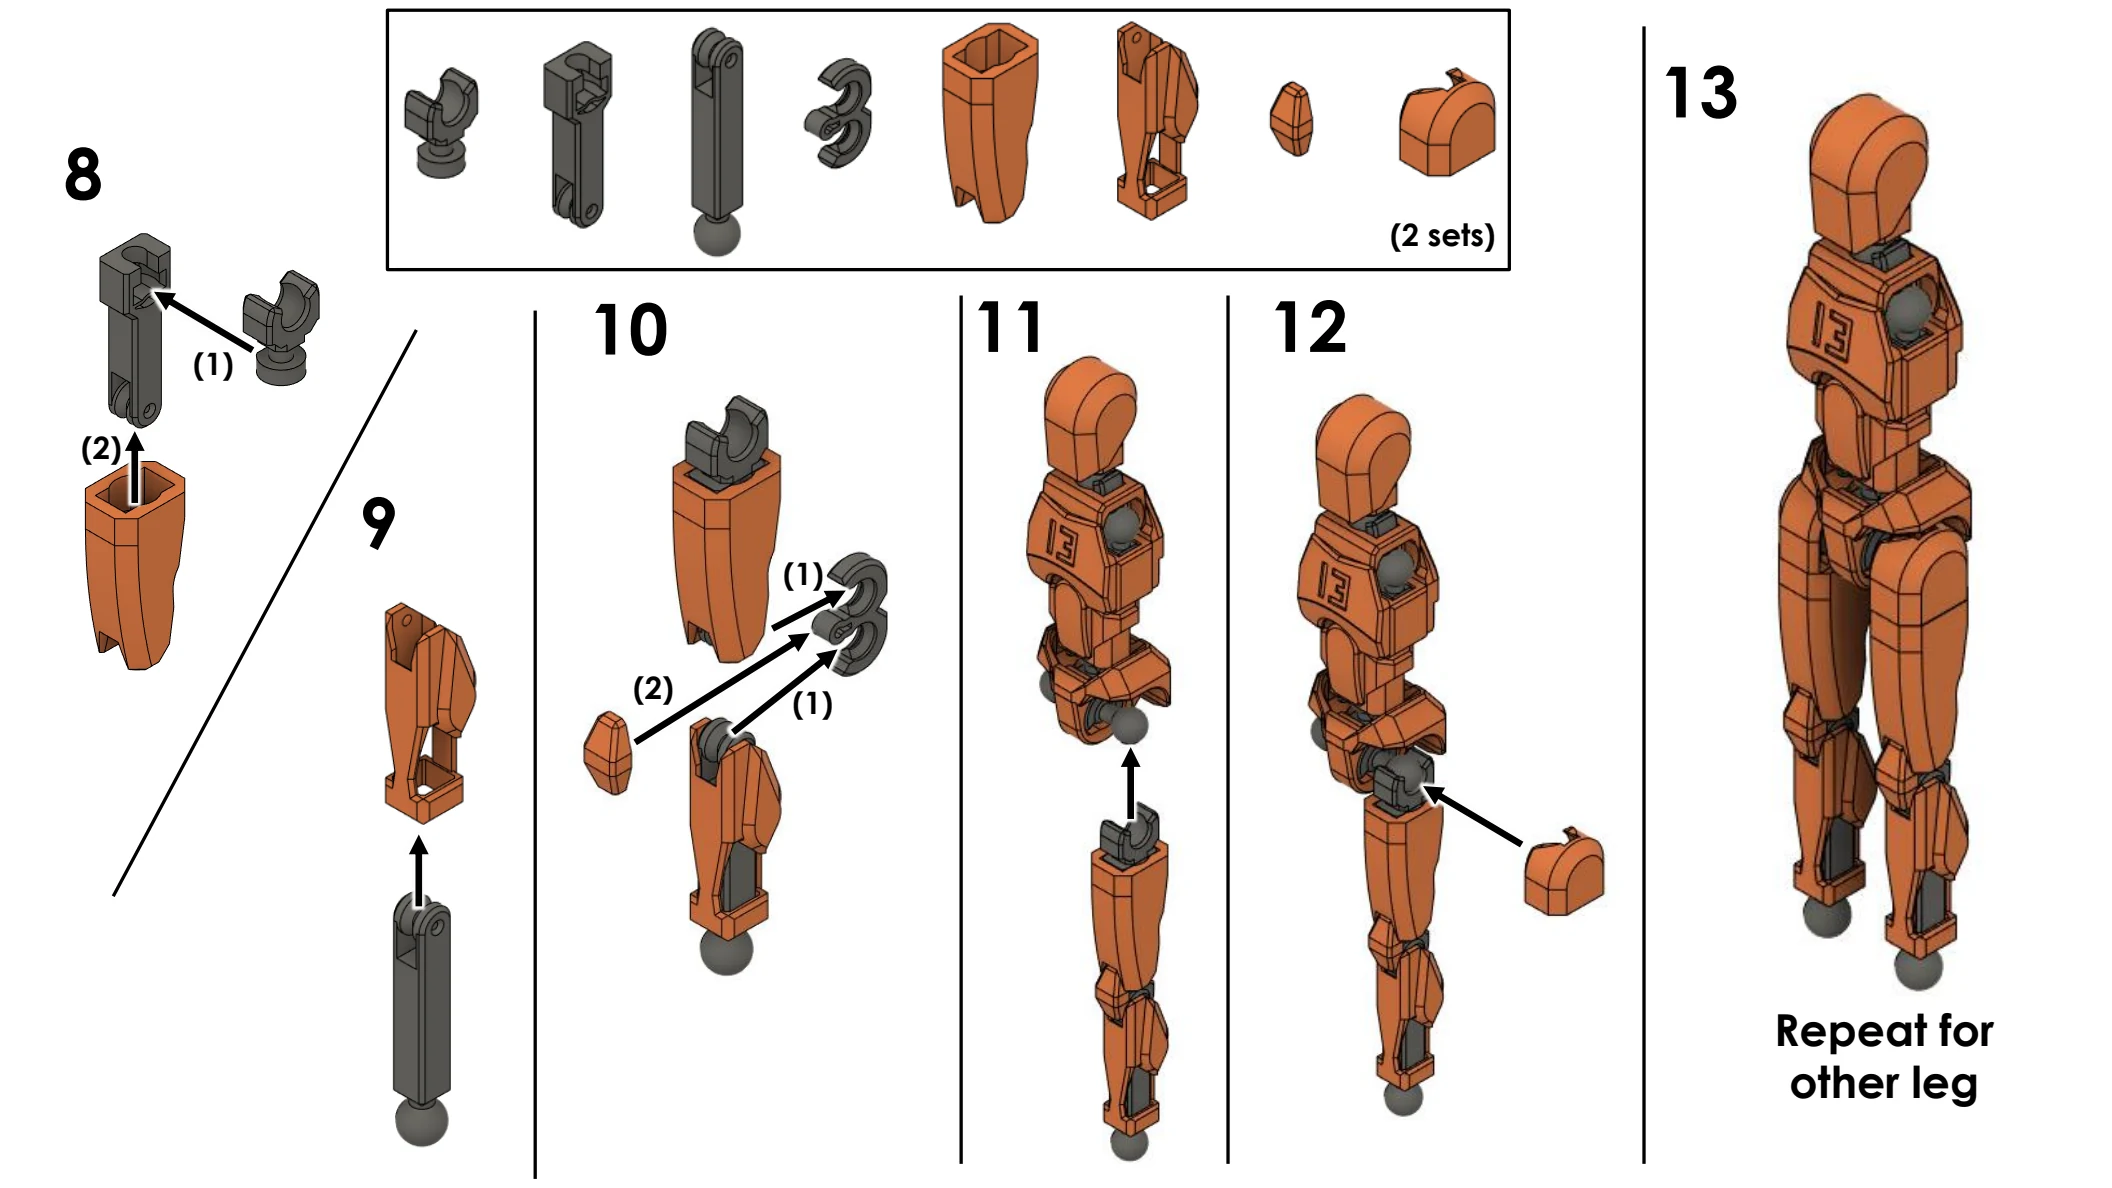
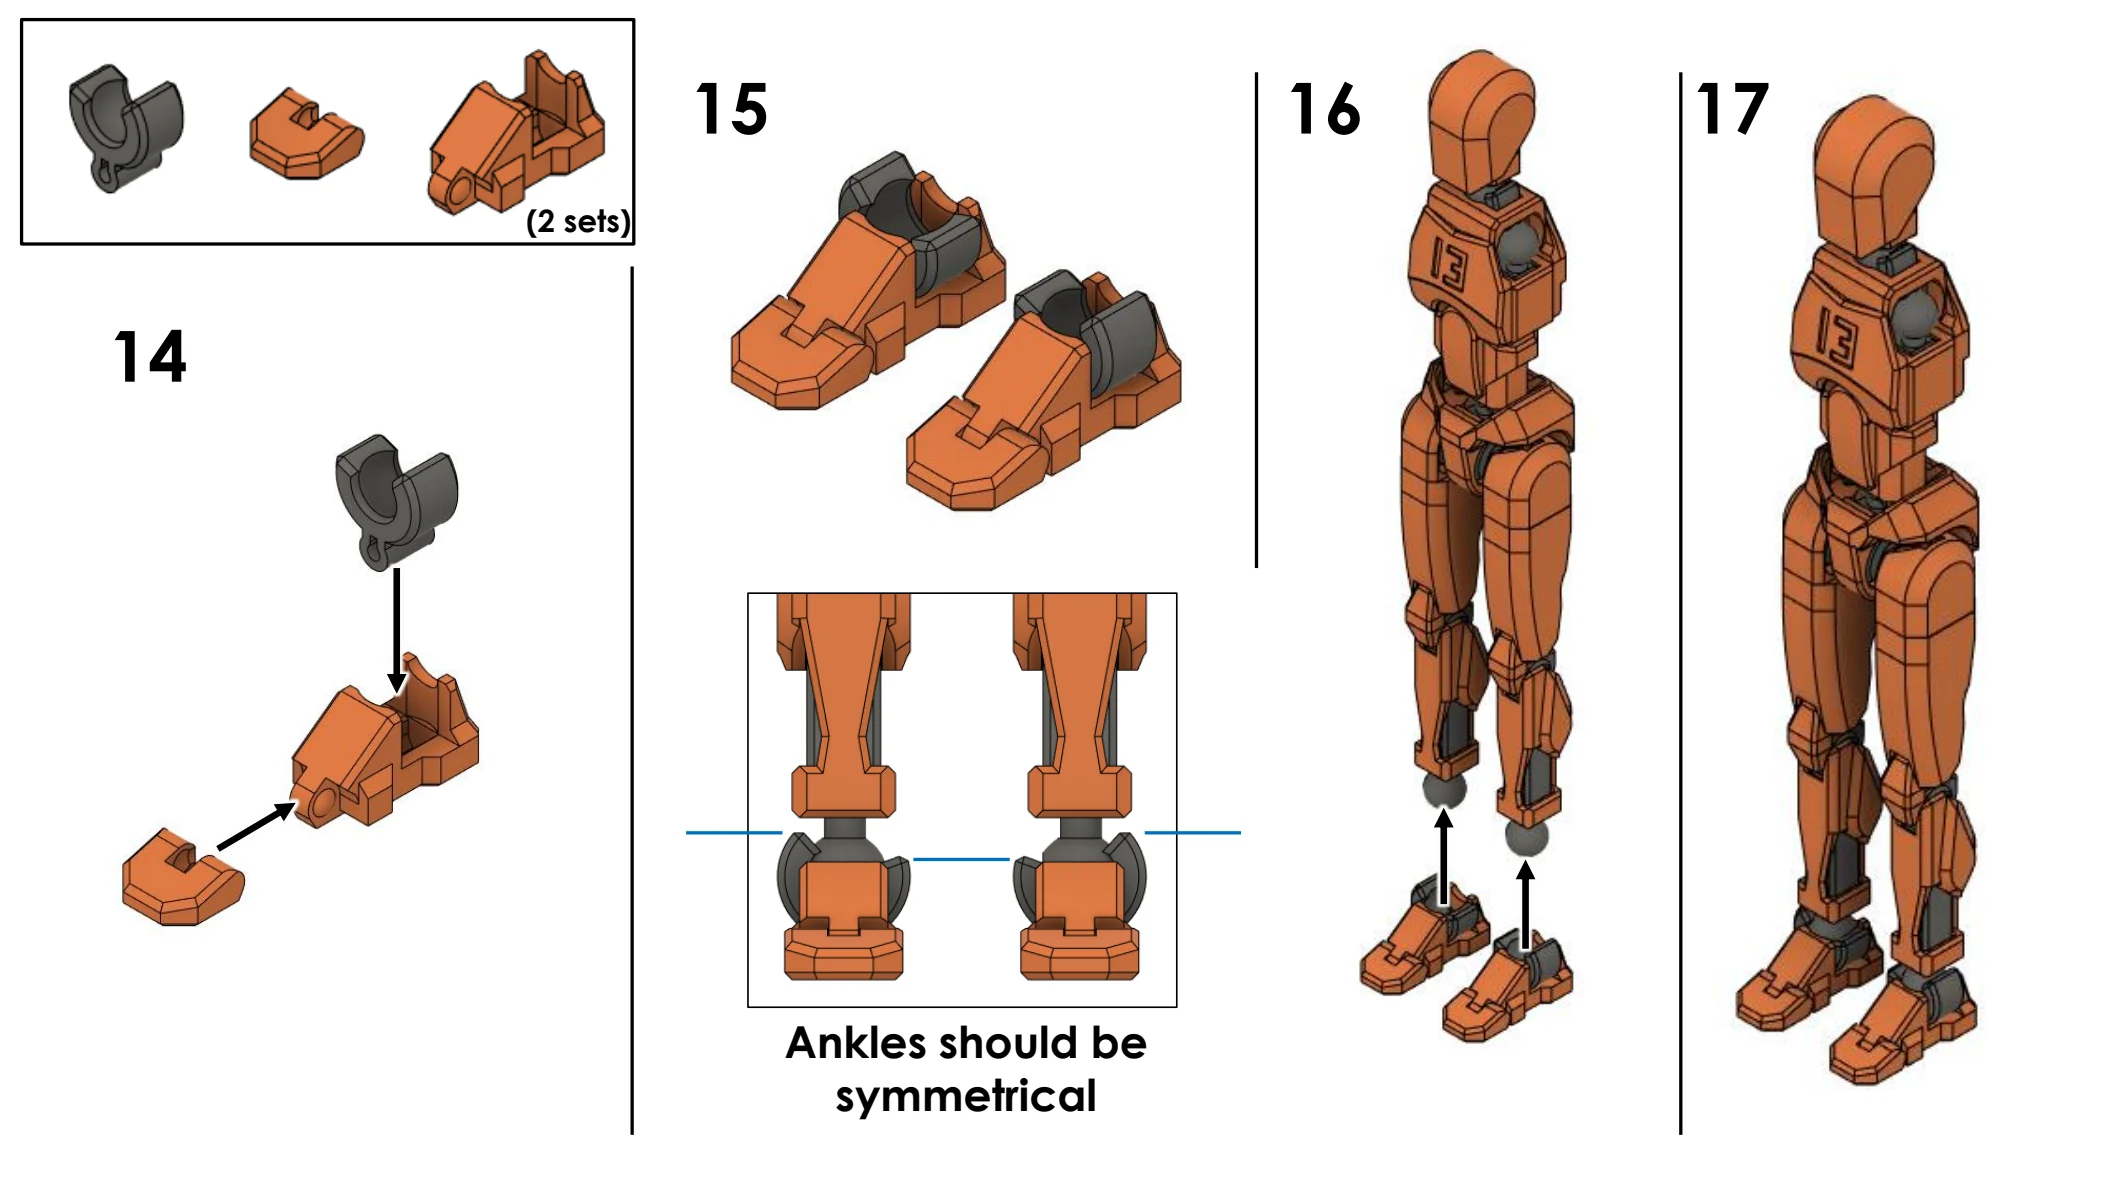
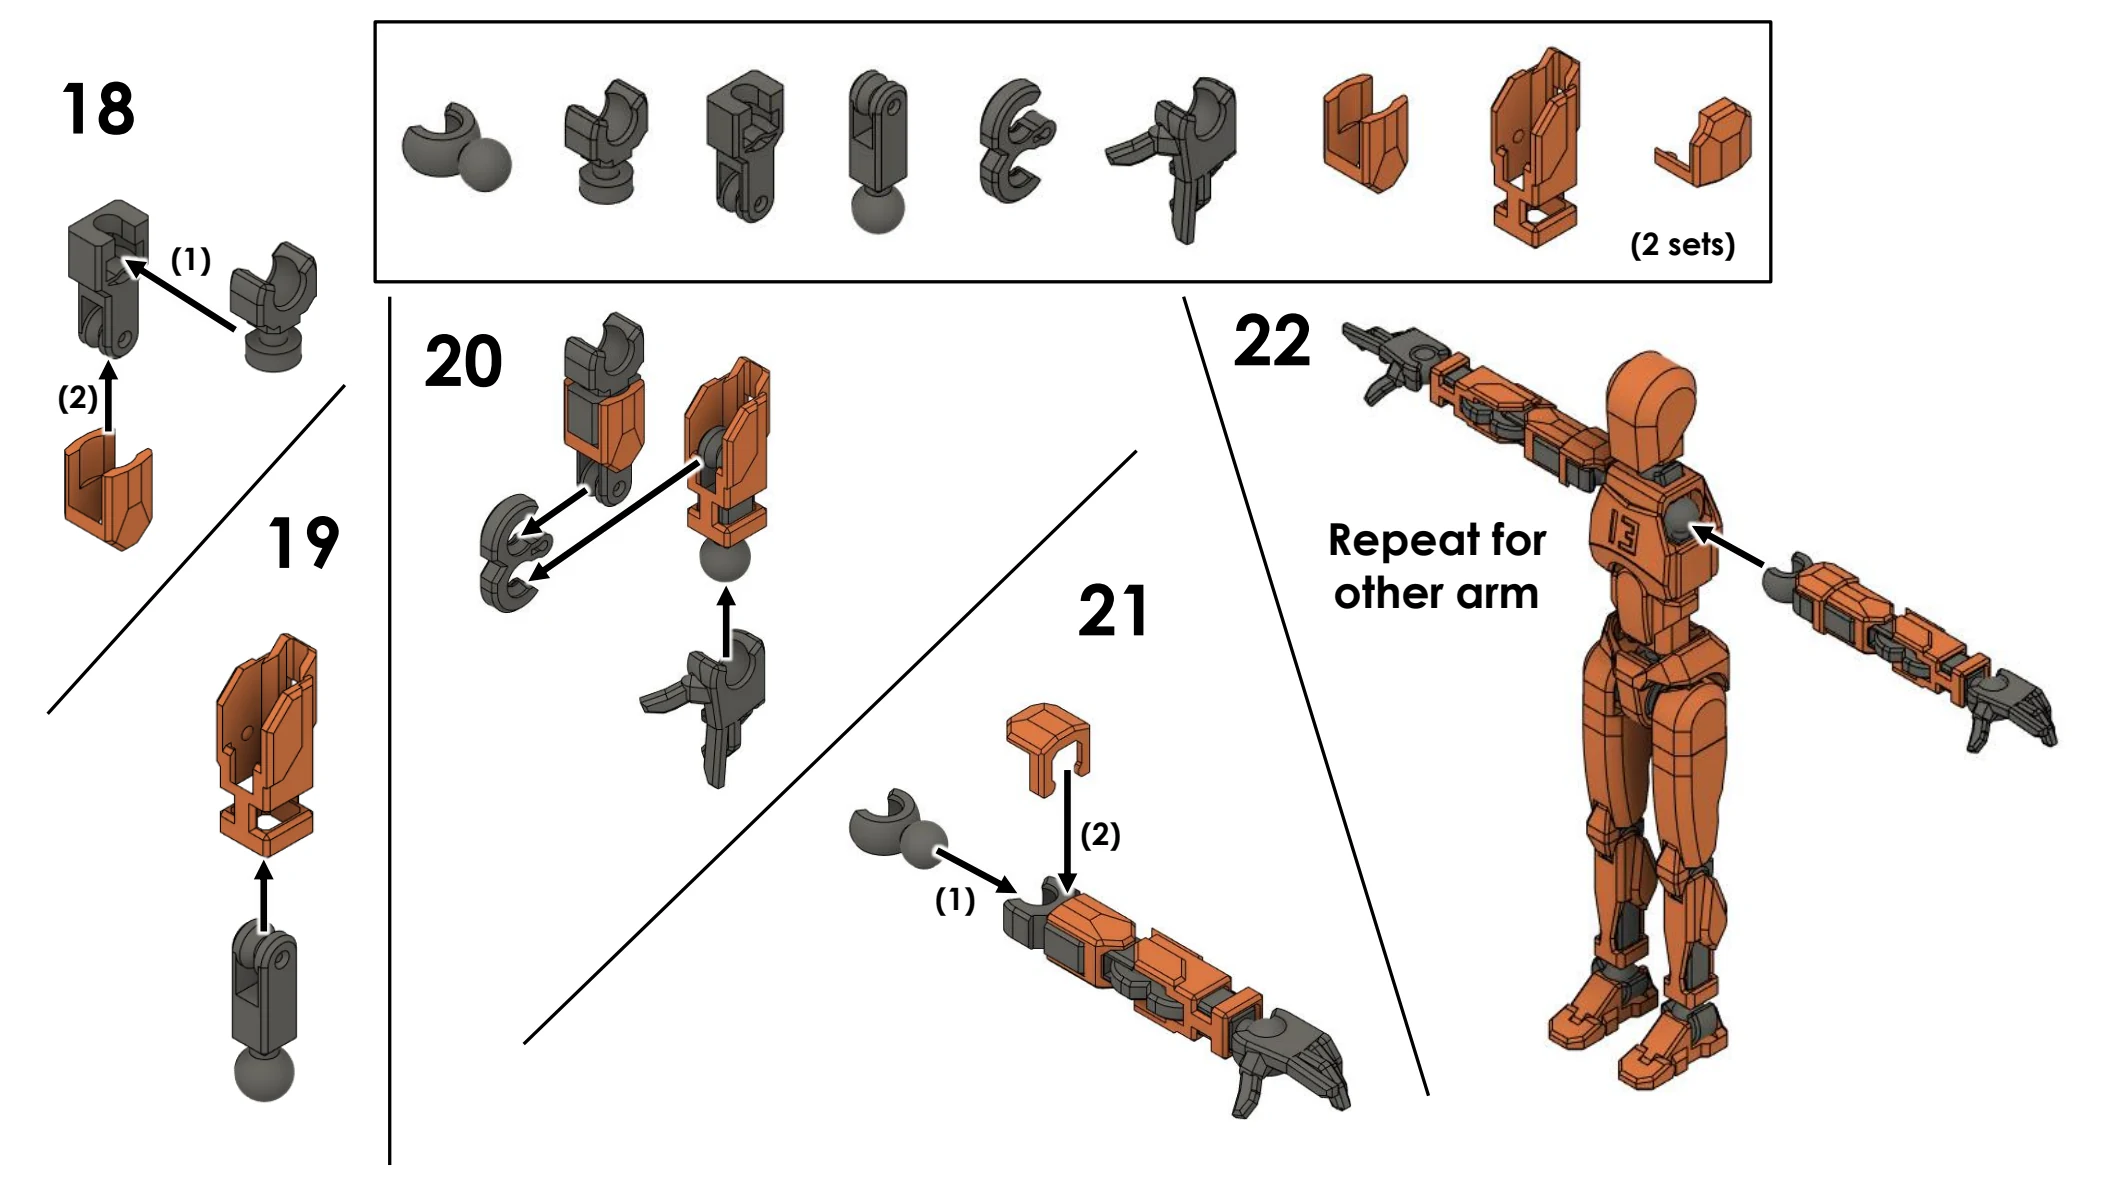
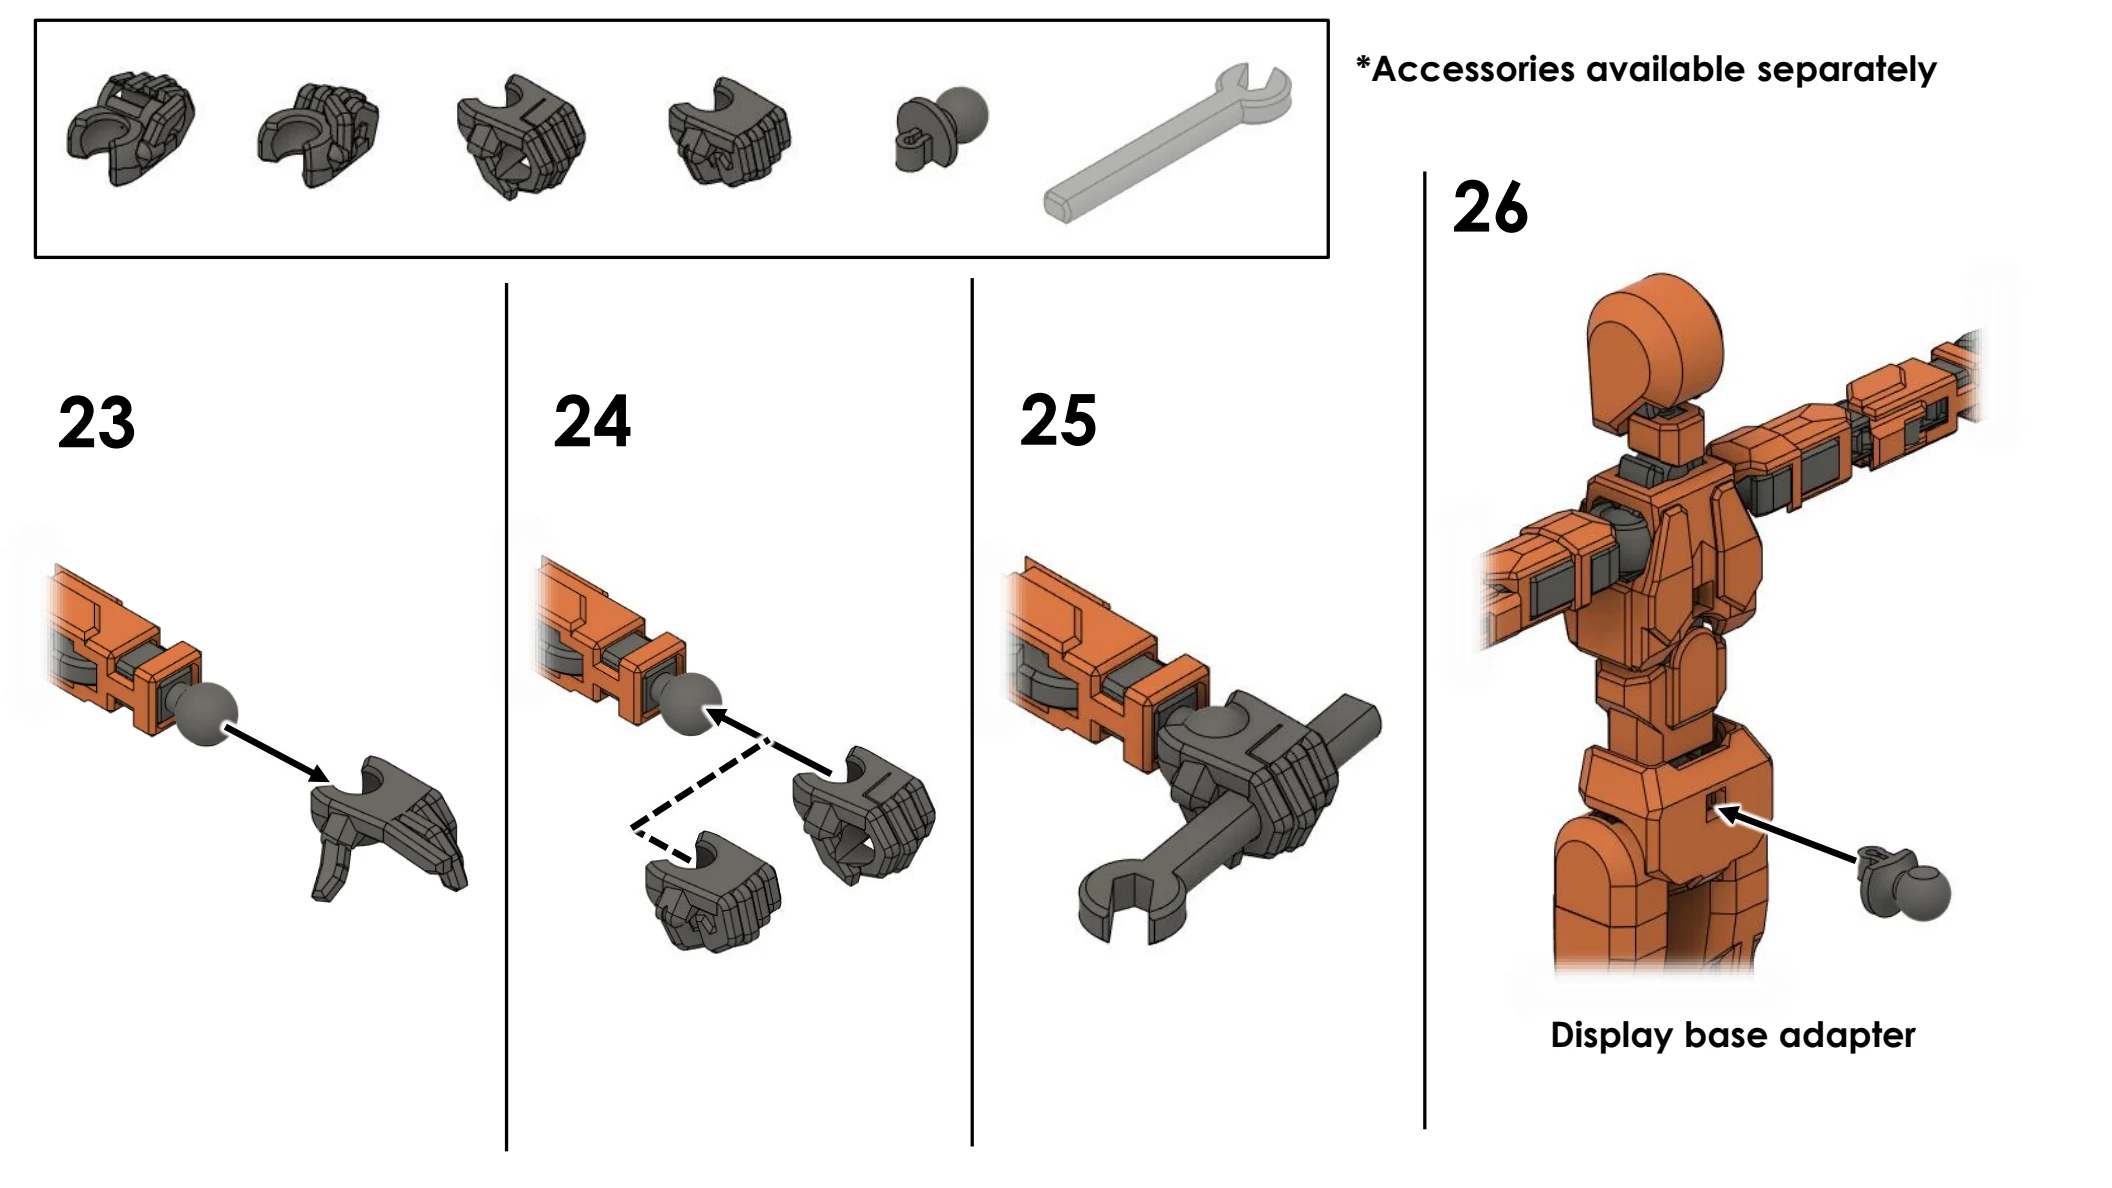
Assembly illustrations: Dummy 13 v1.0 by Gabriel Rosiak / Lucky 13 Toys, licensed under CC BY 4.0.
About the figure
A blank slate built for creativity
Dummy 13 is part of the Lucky 13 Toys 13 Series. Its modular, articulated frame can be posed, recolored, accessorized, and remixed into a figure that feels completely your own.
Dummy 13 was created by Lucky 13 Toys. Visit the official Lucky 13 Toys FAQ for printing, scaling, and assembly details.